Ever found yourself staring at a non-responsive EV charger or a stubborn ceiling fan, feeling that annoying surge of frustration? I’ve been there, too. I remember the first time my EV charger refused to power up right when I needed it most. I was ready to call in a professional, but then I realized—many issues can be solved quickly if you know the right troubleshooting tricks. That lightbulb moment changed everything for me, saving time, money, and a whole lot of stress.
Why Troubleshooting Fast Matters More Than Ever
In today’s busy world, waiting around for an electrician is not an option. Whether you’re eager to hit the road in your electric vehicle or just want your ceiling fan humming comfortably again, speed is key. Plus, a quick fix can often prevent small problems from turning into costly repairs. The good news? With a bit of know-how, you can tackle many common issues yourself. I’ve learned this through trial, error, and plenty of late-night online searches. For example, I once made a mistake by ignoring a simple reset button on my ceiling fan — a mistake that delayed my fix for days. Trust me, avoiding such pitfalls is crucial. If you want to become confident in your troubleshooting skills, I recommend checking out expert tips at this guide.
Is DIY Troubleshooting Actually Worth the Hype?
You might be skeptical. I was, too. Especially when I first started, I worried about making things worse. But the truth is, many problems are straightforward. For instance, in my early days, I overlooked simple causes like loose wiring or tripped circuit breakers. These are common mistakes I see others make, which can be easily avoided with some basic knowledge. When I learned to identify these quick fixes, my confidence skyrocketed. Plus, I found that with the right guidance, troubleshooting can be a rewarding experience rather than a stressful chore. For a reliable starting point, check out these electrician tips for fast repairs.
So, if you’ve ever faced the frustration of a malfunctioning EV charger or ceiling fan and wondered whether you could fix it yourself, know that you’re not alone—and that with the right knowledge, you definitely can. Let’s dive into the practical steps that will turn you from novice to troubleshooting pro in no time.
Check Power Sources Immediately
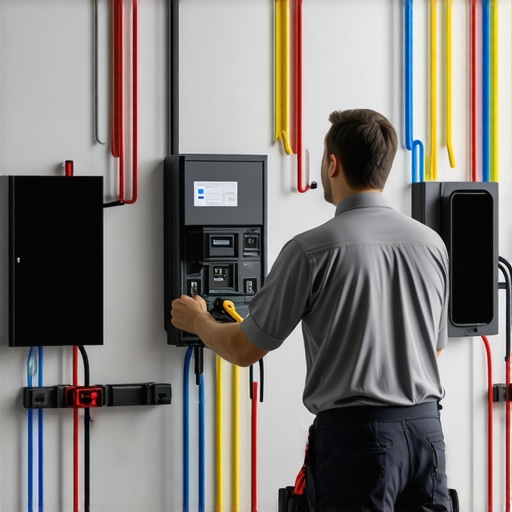
Start by ensuring the device is receiving power. For my EV charger, I first verified the outlet with a multimeter, much like testing a water pipe for leaks before fixing the faucet. If the outlet isn’t working, reset the circuit breaker or replace the fuse. On one occasion, my garage outlet tripped unexpectedly, leaving my EV charger dead. Resetting the breaker restored power instantly, saving me a costly call.
Inspect Wiring and Connections Carefully
Loose or damaged wiring is a common culprit. I once opened my ceiling fan’s cover and found a loose wire connector, which explained the intermittent humming. Tightening the connection with a screwdriver and applying dielectric grease prevented future issues. Remember, always turn off power before inspecting wiring to avoid shocks. Think of it like tightening a loose bolt on a bicycle—simple but effective.
Reset or Reboot the System
Many devices have a reset button. My ceiling fan has a small reset switch hidden behind the canopy. Pressing it resets the internal electronics, often fixing unresponsive behavior. For my EV charger, unplugging it for 30 seconds and then plugging back in essentially rebooted its system, just like restarting a sluggish computer. If your device has a reset option, don’t skip this step—it’s quick and often resolves the problem.
Test Circuit Breakers and Fuses
Tripped circuit breakers or blown fuses cut power without warning. I once replaced a blown fuse in my garage panel, which immediately restored the ceiling fan’s operation. Always check the breaker panel and replace blown fuses with the correct type. Think of this as replacing a burnt-out light bulb—simple but essential.
Examine Controls and Switches
Faulty switches can prevent devices from powering up. I replaced a faulty wall switch controlling my ceiling fan after noticing it was loose. Sometimes, flipping the switch multiple times can clear minor contact issues. For my EV charger, I checked the app and physical buttons to ensure they weren’t the source of the problem. Ensuring your switches are clean and securely connected can save a trip to the store.
Use Testing Tools for Precise Diagnosis
Invest in a multimeter or voltage tester. I used a multimeter to verify voltage at the outlet and found it was lower than expected, indicating an wiring issue further upstream. Precise measurements help distinguish between simple fixes and more complex electrical problems. Think of it as a doctor using a stethoscope to listen to your heart—vital for accurate diagnosis.
Identify Overheating or Visible Damage
Look for scorch marks, melting, or burnt smell. My ceiling fan’s motor had a faint smell of burnt plastic, indicating it needed replacement. Replacing damaged parts promptly avoids fire hazards and further damage. Always handle repairs with caution and consider consulting a professional if you spot serious damage.
Consult Reliable Troubleshooting Resources
When in doubt, I turn to trusted guides like expert electrician tips. These resources are gold mines of practical advice, especially for nuanced issues. They can guide you through complex problems step-by-step, saving you time and stress.
Know When to Call a Professional
If your troubleshooting efforts don’t resolve the issue or if you encounter dangerous signs like sparks or burning smells, it’s time to seek expert help. Electrical systems can be tricky and hazardous. Remember, safety always comes first—don’t push beyond your comfort zone.
If you think troubleshooting is just about checking wires and resetting devices, think again. Many DIY enthusiasts fall into traps that can make problems worse or cause safety hazards. Let’s dig deeper into what most people get wrong about troubleshooting ceiling fans and EV chargers, so you can be better prepared and avoid costly mistakes.
Why the Usual Advice Can Lead You Astray
Most guides recommend simply resetting the device or resetting the circuit breaker. While these steps are often effective, relying solely on them is a common myth. For example, some assume that if a ceiling fan isn’t working, a quick reset will fix everything. But in reality, persistent issues might stem from hidden wiring problems or faulty control switches that aren’t resolved by a reset. Overlooking these nuances can lead to repeated failures or fire hazards. Experts warn that a thorough inspection is essential, especially for older wiring or signs of damage. For advanced troubleshooting, consider using a multimeter to check voltage at different points in your system. This can reveal hidden issues like inconsistent power supply that simple resets won’t catch. To learn more about these nuanced approaches, check out these electrician tips.
Common Mistakes That Might Cost You
One trap many fall into is assuming that a device’s symptoms are always caused by a single issue. For example, a ceiling fan that hums but doesn’t spin might be blamed solely on a faulty capacitor. However, it could also be due to loose wiring inside the motor or a malfunctioning switch. Jumping to conclusions without proper diagnosis can lead to replacing parts unnecessarily or even damaging the system further. Another mistake is ignoring safety precautions—such as not turning off power before inspecting wiring. This oversight can lead to shocks or short circuits. Always remember, safety first, and when in doubt, consult a professional. For complex problems, external resources like expert electrician guides offer steps that prevent these costly errors.
Are You Using the Right Tools?
Many DIY troubleshooters rely on visual inspection alone. But for nuanced problems, a multimeter or voltage tester is vital. These tools help you verify whether power is consistent and identify hidden electrical issues. For instance, a power outlet might appear functional but could be delivering inconsistent voltage, which causes your EV charger to malfunction. Using a multimeter correctly can save hours of guesswork and prevent unnecessary repairs. Remember, tools are only as good as your knowledge in using them—so educate yourself on proper testing techniques. For detailed guidance, I recommend reviewing these expert tips.
Have you ever fallen into this trap? Let me know in the comments. Remember, troubleshooting is as much about understanding the nuances as it is about following basic steps. Equip yourself with the right knowledge and tools, and you’ll be surprised how many problems you can solve yourself—saving time, money, and peace of mind.
Keeping your ceiling fans and EV chargers running smoothly over time requires more than just initial troubleshooting. Regular maintenance and using the right tools can extend their lifespan, improve efficiency, and prevent unexpected breakdowns. In this article, I’ll share the specific tools I rely on and the maintenance strategies I recommend, so you can keep your devices performing at their best for years to come.
Why Regular Maintenance Matters
Even the best electrical devices need periodic check-ups. Dust buildup, loose connections, and minor wiring issues can develop over time, especially in high-use environments. If neglected, these small problems can escalate into costly repairs or safety hazards. Consistent maintenance not only preserves functionality but also enhances safety by catching issues early. Think of it like servicing a car—routine checks keep everything running smoothly and avoid breakdowns on the road.
My Go-To Tools for Troubleshooting and Maintenance
One of my most valuable tools is a **digital multimeter**. I use it daily to verify voltage levels and check continuity in wiring — essential for diagnosing power issues in both ceiling fans and EV chargers. I prefer a model with auto-ranging capabilities, like the Fluke 117, because it simplifies testing and reduces errors. Additionally, I keep a **non-contact voltage tester** handy for quick safety checks before touching any wires. It’s a real time-saver and a safety must-have.
For physical inspections, I rely on a **set of insulated screwdrivers**. These are crucial when tightening connections or replacing faulty switches, especially since working with live circuits can be dangerous. I also use a **coil of dielectric grease** to protect wire connections from moisture and corrosion, which is especially useful in outdoor or humid environments.
To keep my devices clean and dust-free, I use a **compressed air canister**. Dust accumulation can cause overheating or interfere with electrical contacts. Regularly blowing out dust from fan motors and control panels helps prevent these issues and keeps everything running quietly and efficiently.
Implementing Preventive Maintenance Routines
Set a schedule to inspect your devices every 6 to 12 months. During these checks, visually confirm wiring is secure, clean contact points with compressed air, and test power flow with your multimeter. If you notice any signs of overheating, burn marks, or corrosion, it’s best to replace affected parts promptly. For more detailed routines, I recommend reviewing these expert maintenance tips.
Future Trends in Maintenance and Diagnostic Tools
Looking ahead, I predict that smart diagnostic devices will become more integrated into home electrical systems. These tools will continuously monitor device health and alert homeowners of potential issues before they occur. Apps connected to Bluetooth-enabled multimeters or IoT sensors could provide real-time data, making maintenance even more proactive and less time-consuming. Staying updated with these advancements will help you keep your electrical system reliable and safe.
How do I maintain my electrical devices over time?
The key is consistency. Regular inspections, cleaning, and testing with reliable tools like digital multimeters and non-contact testers will catch problems early. Also, keep spare parts like switches, fuses, and capacitors on hand for quick replacements. If you’re unsure about a diagnosis or safety is a concern, don’t hesitate to consult a professional. Remember, investing in proper tools and routine maintenance not only saves money but also ensures your home’s safety and comfort for years to come. For more detailed guidance, check out these troubleshooting tips.
The Hardest Lesson I Learned About Troubleshooting Electrical Devices
One of the biggest realizations I had was that many problems stem from overlooked details. For example, I once spent hours trying to fix my ceiling fan when the real issue was a loose wire connection inside the switch. That taught me to always check the basics before diving into complex diagnostics. It’s tempting to jump straight to replacing parts, but patience and thorough inspection often save time and money.
Why I Swear by These Tools for Fast Fixes
My essential toolkit includes a digital multimeter for precise voltage readings and a non-contact voltage tester for quick safety checks. These tools have been game-changers, helping me identify issues without guesswork. I trust brands like Fluke for their accuracy and durability, and I recommend keeping a set of insulated screwdrivers handy for safe wiring inspections. Regular use of these tools keeps my troubleshooting sharp and my repairs reliable.
What I Wish I Knew When I Started Troubleshooting
Early on, I underestimated the importance of safety. Always turn off power before inspecting wiring, and never assume a device is safe to handle just because it looks fine. Also, I learned that a good troubleshooting process involves testing step-by-step, verifying power at each stage, and consulting trusted resources. This approach prevents mistakes that could cause further damage or safety hazards. Remember, patience and methodical checks are your best allies in electrical troubleshooting.
Reading this post really resonated with me, especially the part about how a simple reset can sometimes solve what seems like a complex problem. I remember a time when my ceiling fan kept humming but wouldn’t spin, and I was ready to call an electrician. Instead, I checked the switch and wiring, and surprisingly, a loose connection was the culprit. It’s fascinating how many basic troubleshooting steps can save time and money. I’m curious, has anyone experienced situations where a reset didn’t resolve the issue, and what was the next step you took? I think understanding when to escalate to professional help is key, especially to avoid safety risks. What’s your go-to method if the initial DIY fixes fail? Combining these practical tips with safety awareness really makes troubleshooting less daunting and more empowering.