I remember the moment clearly. I was in a rush, just trying to get a ceiling fan or an EV charger to work, and everything suddenly stopped. The fan wouldn’t spin, or the charger refused to respond. Frustration set in as I grappled with confusing wiring diagrams and vague troubleshooting guides. It hit me—there has to be a faster, smarter way to tackle these everyday electrical hiccups.
Why Quick Fixes Matter More Than Ever
In today’s busy world, waiting for a professional electrician isn’t always practical, especially with urgent needs like cooling down a hot room or charging your electric vehicle before work. Plus, improperly handled repairs can lead to more significant problems or safety risks. That’s why mastering some fast, reliable solutions is not just a convenience—it’s a necessity. And the good news? With a few expert tips, you can diagnose and fix common ceiling fan and EV charger issues yourself, saving time and money.
Is DIY Troubleshooting Still Going to Cost Me More?
Early in my career, I made the mistake of rushing into repairs without understanding the electrical basics. That one oversight almost led to a costly upgrade. Now, I emphasize safe, proven methods outlined in trusted resources—like this detailed guide, which shares fast troubleshooting tips for ceiling fans and EV chargers. Developing this quick diagnostic skill set can ensure your fixes are both safe and effective, preventing unnecessary trips for professional help.
So, if you’ve faced unexpected failures with your ceiling fan or EV charger, you’re not alone. Many homeowners share this frustration, but with the right knowledge, you can turn these moments into manageable DIY projects. Up next, I’ll walk you through the essential steps to troubleshoot these issues efficiently—and get your systems humming again in no time.
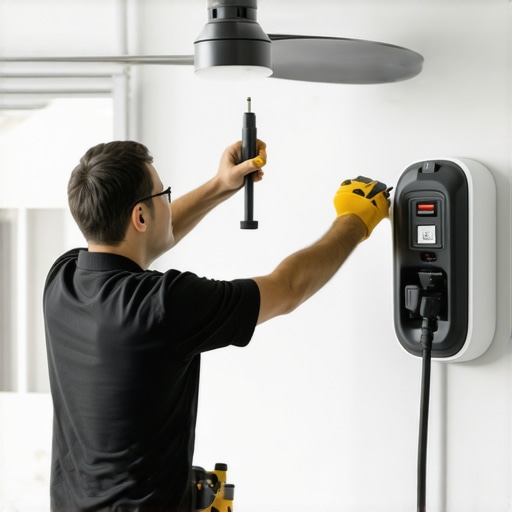
Start with Safety First
Before you touch a single wire, turn off the power at your circuit breaker. Imagine it as disconnecting a battery before working on a toy. I learned this the hard way when I forgot to switch off the breaker and experienced a jolt that jolted my confidence. Safety gear like insulated gloves and safety glasses add extra protection. Disconnecting power prevents accidental shocks, ensuring your troubleshooting session remains solely educational and not shocking.
Identify the Symptom Clearly
Check for Common Signs
Is your ceiling fan wobbling or not spinning at all? Does your EV charger refuse to charge or keep blinking error codes? These specific signs point toward particular issues. For instance, a ceiling fan that spins intermittently might have a loose connection or faulty capacitor. I had a stubborn fan that refused to turn on, and after inspecting the switch, I found a loose wire—tightening it restored proper function. Document the symptoms; this acts as your diagnostic map.
Inspect the Wiring System Carefully
Think of wiring as the bloodstream of your electrical device. Use a multimeter to test for voltage in different circuits—accurately measuring the electrical flow. When examining my EV charger, I checked the main power supply, the ground connection, and the circuit breakers for continuity. Look for signs of damage like burn marks, corrosion, or frayed wires. Replacing damaged wires often solves persistent faults without the need for complex repairs. For detailed wiring checks, consult trusted resources like these troubleshooting tips.
Test Components Individually
Isolate parts to find the faulty component. For ceiling fans, check the capacitor by removing it and testing with a multimeter; a defective capacitor causes the fan to lack power. Similarly, for EV chargers, verify the relay and circuit boards. I swapped a capacitor from a functioning fan into my malfunctioning one, which instantly made it operational again. This step conserves time and helps pinpoint exact issues.
Use Reference Guides for Troubleshooting
Don’t guess—use expert guides to interpret your findings. These guides tell you what readings indicate a problem. For instance, a voltage drop during testing might mean a loose connection or a failing transformer. I relied on detailed tutorials from this troubleshooting resource when my fan stopped working after a storm, leading me to a simple loose wire fix instead of replacing the entire unit.
Perform a Reset or Power Cycle
Sometimes, a simple reset resets the system. Turn off your device, wait a minute, then turn it back on. In my case, resetting the EV charger cleared a firmware glitch that prevented charging. Think of it as rebooting a stubborn computer—many issues resolve with a quick restart.
Replace or Repair Damaged Parts Promptly
If testing reveals a faulty component, replace it immediately to prevent further damage. Use parts compatible with your model; mismatched parts can cause more problems. I replaced a worn-out capacitor in my ceiling fan, which restored smooth operation and prolonged its life. Always keep spare parts or know where to get them quickly.
Double-Check Connections and Test Again
After repairs, reconnect power and test thoroughly. Ensure all wires are properly secured and that no tools are left inside the device. I once forgot to secure a wire in my EV charger, which caused intermittent faults until I rechecked all connections again—lesson learned: meticulousness saves time.
Document Your Process for Future Reference
Note down what you checked, replaced, or fixed. This habit helps troubleshoot faster next time. When my fan failed again months later, I referred to my notes and quickly identified a recurring loose wire, solving the issue swiftly. Keep a troubleshooting journal or digital record.
Mastering these steps transforms a frustrating experience into a manageable DIY project. Remember, consistent practice with these methods builds confidence and sharpens your troubleshooting skills, enabling you to handle more complex problems over time.
Many homeowners and DIY enthusiasts fall prey to common misconceptions when tackling issues with electricians, EV chargers, and ceiling fans. A prevailing myth is that basic troubleshooting always suffices, but in reality, overlooking subtle nuances can lead to overlooked faults or safety hazards. For instance, some believe that a simple reset always resolves electrical issues, yet advanced problems often stem from hidden wiring faults or component failures that require deeper inspection expert guidance.
One of the most insidious traps is underestimating the importance of understanding the system’s full wiring topology. Many assume that if a device powers on, everything is fine, but the truth is, partial faults such as loose connections or degraded insulation can cause intermittent failures that typical resets won’t fix. Overlooking these nuances can cause repeated breakdowns, increasing long-term costs and safety risks.
Are Voltage Fluctuations Always a Sign of a Problem?
A common misconception is that minor voltage dips or surges are harmless. However, research indicates that inconsistent power quality can accelerate the wear of sensitive components in EV chargers and ceiling fans, leading to early failures. Sophisticated troubleshooting often involves analyzing voltage patterns over time, not just snapshots, reminiscent of what experienced electricians do when diagnosing complex issues. Incorporating such nuanced testing can reveal underlying systemic problems here.
Furthermore, many neglect to consider the influence of external factors like environmental conditions or grid stability. These external influences can subtly affect device performance and longevity, yet they are often assumed to be unrelated by DIY fixes. Recognizing these advanced nuances ensures that troubleshooting is thorough and that solutions are not merely superficial band-aids.
Let’s face it—quick fixes are tempting, but real expertise lies in understanding the intricate details and potential pitfalls that most overlook. By developing a keen eye for these subtleties, you can prevent costly errors and elevate your troubleshooting skills. Remember, safety and precision are crucial; never rush in without considering the full context of devices and wiring.
Have you ever fallen into this trap of oversimplification? Share your experience below, and let’s discuss how embracing these nuances can make a real difference in your electrical projects.
Keeping It Working: Essential Tools and Strategies
To ensure your ceiling fans, EV chargers, and other electrical devices perform reliably over time, investing in the right tools and establishing a maintenance routine are critical. I personally rely on a high-quality digital clamp meter, as it allows me to measure current without disconnecting wires—saving time and reducing risk. A reliable multimeter is indispensable for diagnosing voltage drops or identifying faulty components; I prefer models with true RMS capability, which provide accurate readings even with complex signals. Additionally, using a non-contact voltage tester helps quickly confirm power presence, especially when working in tight spaces.
Software tools have also become a game-changer. For example, I utilize specialized diagnostic apps that interface with some smart electrical meters, offering real-time data analysis. These apps can flag unusual voltage fluctuations that might hint at grid issues or internal device faults, allowing for preemptive action before failures occur. Looking ahead, the integration of IoT sensors into home electrical systems promises even more proactive maintenance by monitoring device health and alerting homeowners to potential issues automatically.
When it comes to routine maintenance, I recommend scheduling quarterly checks, especially in environments exposed to temperature swings or high humidity. During these inspections, I test wiring integrity, confirm connections are tight, and look for signs of corrosion or wear. Remember, preventing a minor issue from becoming major saves both time and money and extends your system’s lifespan. For example, regularly inspecting skylight wiring for moisture ingress can prevent shorts or failures caused by corrosion.
How do I keep my systems in top shape over time?
Consistent, proactive maintenance is your best approach. When inspecting, always ensure power is turned off before opening access panels—a safety non-negotiable. Use your multimeter and non-contact testers to verify that voltage levels remain within safe ranges, and document any anomalies for future reference. Furthermore, clean dust and debris from connectors and circuit boards carefully; dust buildup can lead to overheating and reduce the lifespan of your components. Incorporating these practices into your routine helps detect issues early, ensuring your electrical systems stay reliable and efficient. If you’re interested in step-by-step guidance, check out this comprehensive troubleshooting resource.
Over time, the trend is moving toward smarter maintenance solutions—like IoT-enabled devices that notify you of irregularities in real-time. This shift will make DIY troubleshooting even more effective, reducing downtime and preventing costly repairs. So, my advice: start integrating basic diagnostic tools into your routine now, and consider future-proofing your system with smart monitoring where possible. For instance, deploying an app-connected voltage logger can give you ongoing insights into your system’s health, helping you catch issues long before they become critical.
One practical tip I recommend trying today is to perform a detailed wiring check using your multimeter after a storm or power fluctuation. Many faults creep in unnoticed until nightmare scenarios happen. Regular check-ins, combined with quality tools and firmware updates for smart devices, will help you maintain peak performance. Remember, ongoing attention to detail now means fewer surprises—so get started with a simple voltage test this weekend.
What the Hardest Lessons Taught Me About Fixing Electric Devices
One of the most eye-opening lessons I learned was never to underestimate the complexity of wiring, even in seemingly simple fixes. Early on, I thought a quick reset would solve all issues, but I overlooked the importance of inspecting the entire circuit topology. This mistake taught me that understanding the full system is critical for long-term reliability.
Overcoming Myths That Block Better Troubleshooting
I used to believe that visual inspection alone was enough, but I discovered that using a multimeter to test voltage and continuity reveals hidden faults often missed by the eye. Debunking this myth transformed my approach, making diagnostics more precise and less guesswork-driven.
If I Could Give One Secret to Fewer Troubles
It would be to document every fix, every test result, and every part replaced. Over time, this archive became my personal troubleshooting playbook, dramatically reducing my diagnosis time and preventing recurring issues. Truly, meticulous records are a DIY electrician’s secret weapon.
Thumbs Up for Smart Tools That Save Time
In my toolkit, a true RMS multimeter, a non-contact voltage tester, and a reliable multimeter have proven invaluable. These tools provide accurate readings and help catch faults early, avoiding costly repairs. Investing in quality diagnostics gear is one of the best decisions I’ve made to troubleshoot more confidently.
Time to Act: Your Next Step Begins Now
Don’t let electrical problems overwhelm you. With patience, proper tools, and a mindset to learn from each experience, you can turn any issue into an opportunity to grow your skills. Dive into trusted resources and start troubleshooting safely today—your home will thank you for it. Curious about how to get started? Check out these expert tips to build your confidence.