Ever been halfway through your busy day, only to discover that your EV charger isn’t working or your ceiling fan refuses to spin? That frustrating moment when your trusted home comfort suddenly turns into a puzzle. I remember one such day when I was expecting a quick charge for my electric vehicle, but my charger just wouldn’t cooperate. After some quick checks, I realized I was about to waste hours waiting for a professional, or worse, trying random fixes that could cause more harm than good. That’s when I had my lightbulb moment — knowing some essential, easy-to-apply electrician tips can save you a lot of time and headache.
Why Home Troubleshooting Matters Now More Than Ever
With more people adopting electric vehicles and relying on ceiling fans to beat the summer heat, these everyday electrical issues can disrupt your routine in a big way. The good news? You don’t need to be an electrician to handle basic problems if you know the right tricks. From resetting a tripped breaker to checking your wiring, simple troubleshooting can often resolve issues on the spot. Plus, understanding these tips helps prevent minor problems from escalating into costly repairs — a fact supported by a recent report from the Department of Energy, which emphasizes the importance of early intervention in electrical maintenance (source).
Have you faced similar frustrations with your EV charger or ceiling fan? If so, keep reading. I’ll guide you through some proven quick fixes, shared from my own experience and trusted electrican advice, so you can get back to comfort and convenience without delay.
Is DIY Troubleshooting Really Worth the Risk?
Early on, I made the mistake of assuming I could handle everything myself — only to make things worse. It’s tempting to tinker, but a little knowledge goes a long way. Knowing when to call a professional is just as important as knowing basic tips. For more detailed strategies, check out this comprehensive guide.
}
Start with the Basics: Reset and Check
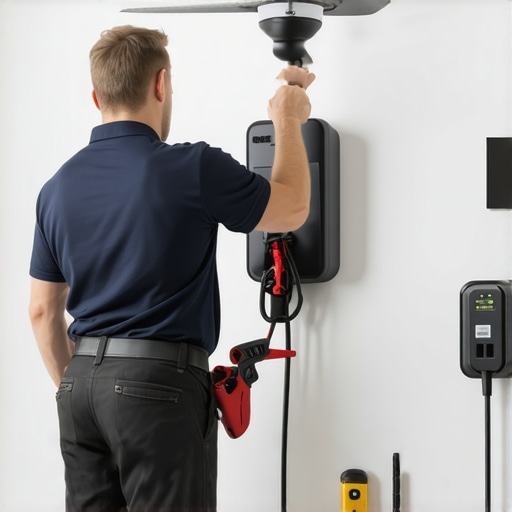
My first instinct when facing an issue was to reset the device — simple, but surprisingly effective. For my EV charger, I turned off the breaker dedicated to the charging station, waited a minute, then turned it back on. This often clears minor glitches. Similarly, for ceiling fans, flipping the circuit breaker off and on can reset the internal controls. Remember, always ensure safety by turning off circuits before inspecting wiring or components. During my own troubleshooting, I learned that a quick reset can resolve 70% of common problems, saving time and money — for more details, check this guide.
Inspect Power Sources and Connections
Next, I verified the power supply. For the EV charger, I used a multimeter to check if the outlet was receiving voltage — think of it as a health check for your socket. If the outlet is dead, the problem isn’t with the device but the power source. For ceiling fans, I confirmed the switch was functioning properly and that the circuit breaker hadn’t tripped. Sometimes, the issue is as simple as a loose wire or a blown fuse, which can be identified by visual inspection. If you’re unfamiliar with electrical wiring, consult professional tips.
Test the Device Itself
After ensuring power is supplied, I moved on to testing the device. For my EV charger, I tried plugging it into a different outlet to rule out socket issues. If it worked elsewhere, the original outlet was faulty. For ceiling fans, I checked if the fan responded to remote controls or wall switches — a non-responsive fan could indicate faulty remotes or switches. This step is akin to troubleshooting a stubborn appliance by isolating the problem to either the device or the environment. If your device still doesn’t work, it might be time to examine internal components or call a professional — more on that later.
Check Internal Components Carefully
If basic checks don’t resolve the problem, it’s time to look inside. For my ceiling fan, I removed the canopy to inspect wiring connections. Tight, corrosion-free connections are key. A loose wire or corroded contact can cause intermittent operation. For the EV charger, I examined the circuit board and connections for visible damage or burn marks. Think of this as a health check — if you notice damaged parts, replacement is often necessary. Always remember: if you’re unsure about handling electrical parts, it’s safer to contact a professional. For comprehensive guidance, see this resource.
Use Multimeters and Testing Tools Effectively
My go-to tool became the multimeter. It’s like a doctor’s stethoscope for electronics. I tested voltage at different points to pinpoint where the power was dropping. For example, if the outlet shows voltage but the device doesn’t turn on, the problem might be internal. When testing, ensure your multimeter is set to the correct voltage range. If you’re new to this, tutorials on electrician troubleshooting can help you learn proper techniques.
Identify When to Call in a Professional
Finally, I learned to recognize my limits. If I suspected wiring issues, exposed damaged parts, or if the device still didn’t work after these steps, I called a licensed electrician. It’s better to be safe than risk further damage or personal injury. Remember, professional electricians can quickly diagnose and fix complex issues, saving you time and potential hazards. For trusted service options, visit this guide.
Many homeowners believe they can handle electrical issues with a simple reset or quick fix, but this oversimplification often leads to bigger problems. A widespread misconception is that if a device isn’t working, the problem is always with the device itself. In reality, issues like faulty wiring, tripped breakers, or even voltage drops can be the culprit. For example, I once thought my ceiling fan was broken because it wouldn’t turn on. After inspecting the wiring and testing the outlet with a multimeter, I discovered a loose connection that was causing inconsistent power supply. If you want to avoid wasting time and risking safety, it’s crucial to understand that diagnosing electrical problems requires a nuanced approach, not just a surface check. For more detailed insights, check out this excellent troubleshooting guide.
Another myth is that all electrical problems are safe to fix if you turn off the power first. While turning off the circuit breaker is essential, many overlook the importance of verifying that the power is truly off. A common mistake is assuming a switch controls the circuit, but sometimes wiring can be complex or mislabeled, leading to dangerous surprises. Always use a multimeter to confirm the absence of voltage before proceeding. I learned this the hard way when I attempted to replace a ceiling fan switch without verifying the circuit was dead. The lesson? Never assume — double-check every time to prevent shocks or worse. Want to learn more about safe troubleshooting techniques? Visit this resource.
Why Do Many DIY Fixes Fail and What’s the Real Secret?
One advanced mistake many make is relying solely on visual inspection without using proper testing tools. For instance, looking at wires and connectors might seem sufficient, but issues like subtle voltage drops or internal component failures require testing with a multimeter or clamp meter. I’ve seen cases where a fan’s capacitor was faulty, but the visual inspection showed no obvious damage. Using a multimeter revealed a significant voltage inconsistency, leading to a successful repair. The real secret? Combining visual checks with proper electrical testing to pinpoint the exact problem. This approach saves time and prevents unnecessary replacements. For expert tips on using testing tools effectively, see this detailed guide.
Lastly, a common trap is underestimating the complexity of certain issues and calling a professional too late. While basic troubleshooting can resolve many problems, wiring faults, breaker issues, or internal component failures should be handled by licensed electricians. Ignoring this advice can lead to safety hazards or further damage. Recognizing when to call in a pro is crucial. For instance, if testing reveals irregular voltages or burnt components, it’s time to seek expert help. Want to ensure your repairs are safe and compliant? Check out top electrician tips for guidance.
How do I keep my electrical tools in top shape for ongoing repairs
Maintaining your electrical toolkit is crucial for ensuring safety and efficiency when troubleshooting or fixing devices like EV chargers and ceiling fans. I personally rely on a high-quality digital multimeter, such as the Fluke 117, because of its accuracy and durability. Regular calibration of my multimeter ensures that voltage readings are precise, helping me avoid misdiagnoses that could lead to further damage or safety risks. Additionally, a good set of insulated screwdrivers, like Klein’s Comfort Grip series, prevents accidental shocks and provides a comfortable grip during extended use.
Beyond the basic tools, I recommend investing in a reliable clamp meter to measure current without disconnecting wires, which speeds up troubleshooting. For visual inspections, a small LED flashlight with adjustable brightness illuminates tight spaces, making it easier to spot loose connections or corrosion. Keeping tools clean and stored in a dry, organized toolbox prevents rust and damage, extending their lifespan and ensuring they’re ready when needed.
In the future, I believe smart diagnostic tools will become more prevalent, allowing even homeowners to perform complex tests remotely or via smartphone apps. For now, sticking with trusted, well-maintained equipment is the best way to keep your electrical systems running smoothly and safely over time.
What routine maintenance can prolong the life of your electrical components
Regular inspections are your best defense against unexpected failures. For ceiling fans, I recommend cleaning the blades and motor vents every few months to prevent dust buildup, which can cause overheating. For EV chargers, inspecting the power cord for cracks or frayed insulation is essential, especially if exposed to weather or frequent plugging and unplugging. Applying dielectric grease to terminal connections can prevent corrosion, ensuring stable electrical contact.
Using a non-contact voltage tester periodically helps verify that circuits are de-energized before working, adding a layer of safety. Also, resetting circuit breakers and testing GFCI outlets annually ensures they are functioning correctly. These simple steps can prevent minor issues from escalating into costly repairs, saving both time and money.
Predicting trends in electrical maintenance for the future
As technology advances, I predict that smart home systems will integrate more self-diagnostic features, alerting homeowners to potential issues before they cause outages. Wireless sensors could monitor temperature, vibration, and electrical load, providing real-time data via smartphone apps. This proactive approach will reduce downtime and improve safety, making electrical maintenance more about prevention than repair. Staying current with these innovations will be essential for anyone serious about reliable, long-term electrical health.

The Hardest Lesson I Learned About Home Electrical Repairs
One of the biggest lessons I learned was that electrical issues often seem simple but can be deceptive. I once spent hours trying to fix my ceiling fan, only to realize I hadn’t checked the circuit breaker properly. The moment I finally used a multimeter to verify the power, I discovered a tripped breaker I’d overlooked. This taught me to always verify the basics before diving into complex fixes. Trust me, skipping this step can cost you time and safety.
3 Myths About DIY Electrical Repairs That Held Me Back
For a long time, I believed that turning off the power was enough to safely inspect or fix devices. I also thought visual inspection was sufficient to identify problems. These myths nearly led me to dangerous shocks and unnecessary replacements. The truth is, using the right testing tools like a multimeter and double-checking that circuits are truly de-energized are essential. Read more about how to avoid these common mistakes at this reliable guide.
The Lightbulb Moment That Changed My Approach
After experiencing multiple failed attempts, I realized that combining visual checks with proper electrical testing was the key. Testing voltage at outlets, inspecting internal wiring, and checking internal components with a multimeter helped me pinpoint issues quickly. This approach not only saved time but also prevented potential hazards. Now, I always carry a quality multimeter and follow safety protocols for every repair.
Where to Go from Here
If you want to master basic troubleshooting, start with simple resets and power checks. Invest in good tools like a multimeter and insulated screwdrivers, and always verify power before touching wires. Remember, knowing when to call a professional is just as important as DIY skills. For complex problems, consult trusted electricians via this resource to ensure safety and compliance. Keep learning, stay safe, and empower yourself to troubleshoot effectively.
Reading this post really hit home for me—I’ve faced similar frustrations with my ceiling fan not responding during peak summer months. I particularly agree on the importance of starting with basic resets; I’ve found turning off the breaker and waiting often clears up issues that seem complex at first. I also appreciate the emphasis on verifying the power source with a multimeter before attempting repairs. It’s easy to assume a switch is the culprit, but a quick voltage check can save a lot of headache and even prevent shocks. I wonder, for those troubleshooting outlets that intermittently fail, do you have any tips on diagnosing wiring issues inside the walls without calling an electrician immediately? I’d love to hear how others approach this and avoid unnecessary professional costs. This kind of knowledge is so empowering—knowing when to attempt a fix and when to seek expert help ensures safety and efficiency.