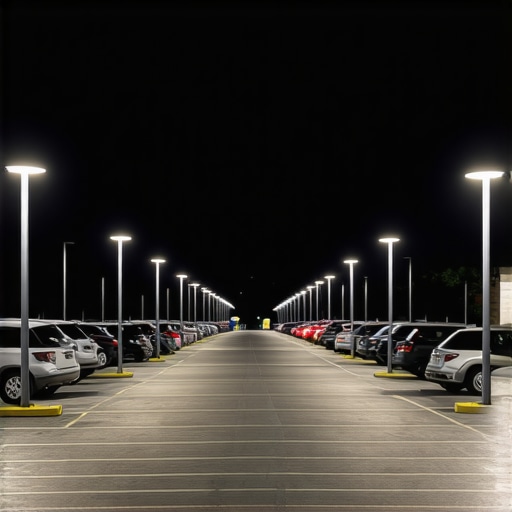
The Autopsy of a Dark Parking Lot: Why Cheap Luminaires and Poor Layouts Invite Catastrophe
Walk out to your commercial property at 2:00 AM on a rainy November night. Stand in the shadows near the back fence line. If you can’t read the plate number on a car twenty feet away, or if you smell that unmistakable, sharp tang of ozone radiating from a corroded pole-base handhole, your parking lot is a liability lawsuit waiting to happen. As a master forensic electrical inspector, I don’t look at parking lot lighting as a decoration; I look at it as a safety system. When a commercial space has deep pockets of darkness, it’s almost always a combination of bad photometric design, degraded lamp ballasts, and corroded underground infrastructure.
Many property owners think they can solve their visibility issues by simply slapping high-wattage LED retrofits into old HID housings. They bypass the ballast, jam the new bulb in, and call it a day. But they ignore the underlying physical reality of light distribution and current load. Within six months, they are dealing with flickering fixtures, dead circuits, and black zones that make their properties prime targets for crime. Let’s dissect why parking lot lighting systems fail, how to diagnose the hidden electrical decay beneath the asphalt, and how to engineer a layout that leaves no room for shadows.
“Auxiliary outdoor lighting systems must be maintained in proper working order, ensuring that branch circuits are protected from moisture ingress to prevent high-resistance ground faults that can render entire pole lines dark.” – NFPA 70 National Electrical Code (NEC)
The Flipper Special: A Story from the Trenches
I once walked into a ‘fully renovated’ strip mall parking lot where the previous developer had buried live junction boxes directly under the asphalt without any conduit seals or handholes. I found them using my underground wire tracer and a high-frequency radar locator. The pavement above one of the buried connections was actually warm to the touch because water had seeped into the wire nuts, creating a continuous high-resistance ground fault. The circuit hadn’t tripped because the breaker was an old, seized unit, but it was leaking current into the surrounding soil, drying out the mud and waiting to shock the next utility worker who dug nearby. That is what happens when amateurs attempt commercial lighting installation services without understanding the harsh realities of burial depth and water table dynamics.
The Electro-Geographic Reality: Water, Salt, and Underground Decay
When engineering or repairing commercial outdoor illumination, your geographic location dictates your primary points of failure. In coastal regions or northern climates where road salt is used heavily, the enemy is galvanic corrosion. Rainwater carries dissolved salts down through the concrete pole bases, directly into the handholes where the branch circuit conductors connect to the fixture whips. Salt bridges the gap between phases, chewing through copper conductors via electrolytic action. This leads to a massive voltage drop down the line, causing the furthest poles to flicker or fail completely.
Inside these damp pole bases, you’ll often find that the installer skipped using proper watertight connectors. When water meets copper and aluminum in a confined, unventilated space, oxidation layers form. These layers increase electrical resistance, which generates heat. Under heavy continuous loads, this thermal stress can degrade the wire insulation until it cracks, leading to an arc fault that can weld your conductor directly to the interior of the steel pole. To prevent this, we pack every low-point connection with heavy-duty dielectric grease, seal the conduit entries with specialized sealants—often called “monkey shit” in the field—and utilize heavy-walled PVC or hot-dip galvanized rigid conduit.
The Anatomy of a Dark Spot: Photometrics vs. Handyman Guesswork
Eliminating dark spots isn’t about raw lumens; it’s about distribution angles. Standard light fixtures throw light in specific patterns, designated by the Illuminating Engineering Society (IES) as Types I through V. A common mistake is using Type V (omnidirectional, circular) fixtures along the perimeter of a property. This dumps half your light onto the neighboring residential lot—causing light pollution complaints—while leaving the driving lanes in pitch darkness. For perimeters, you need Type III fixtures that push light forward and outward into the parking stalls.
When we perform a professional layout, we calculate the foot-candle requirements across the entire surface. For a standard commercial parking lot, you want a minimum of 1 to 2 foot-candles of light at the darkest point, with a uniformity ratio of 4:1 (the brightest spot should not be more than four times brighter than the darkest spot). When the ratio is too high—say, 20:1—the human eye cannot adjust quickly enough as a customer walks from a bright zone into a shadow, effectively blinding them to oncoming traffic or tripping hazards.
Diagnostic Tactics: Tracing the Phantom Faults
Before you run new wires or buy expensive LED fixtures, you must perform diagnostic testing on the existing underground distribution system. We start by pulling out our trusty “Wiggy” (solenoid voltage tester) and a high-resistance megohmmeter (megger) to test the insulation integrity of the underground feed. If the megger shows a reading below 50 megohms, you have a nick in your Romex or direct-burial cable underground that is actively leaking current to the earth.
We also utilize remote electrical diagnostics to monitor voltage drop at the furthest pole under full load. If your supply voltage drops by more than 3% at the end of the run, your conductors are undersized for the distance, or you have a failing high-resistance splice hidden in one of the pole bases. Addressing these infrastructure flaws is critical before upgrading your fixtures, as voltage fluctuations will destroy the sensitive electronic drivers inside modern LED luminaires, turning an expensive upgrade into fried scrap metal in a matter of weeks.
“Conductors used in wet locations must be of an insulated type approved for the specific environment, as water accumulation in raceways can lead to insulation breakdown and catastrophic arc tracking.” – Underwriters Laboratories (UL) Safety Standard 8750
The Upgrade Protocol: Getting it Right the First Time
If you are ready to eliminate dark spots and protect your business from liability, you must follow a strict, code-compliant sequence of operations. This isn’t a simple DIY job; it requires specialized machinery, trenchers, and bucket trucks to handle heavy high-voltage components safely.
- Step 1: Perform a Comprehensive Photometric Study. Use CAD software to map your parking lot, entering pole heights, spacing, and property lines to determine the exact fixture wattages and optical distributions needed.
- Step 2: Inspect and Megger the Underground Branch Circuits. Isolate the conductors at both ends and test them at 1000V to ensure the insulation isn’t degraded. Replace any lines that show leakage to ground.
- Step 3: Clean and Re-Torque Every Pole-Base Handhole Connection. Cut away oxidized copper, strip back to clean metal, and use split-bolt connectors wrapped in rubber splicing tape and premium vinyl tape.
- Step 4: Swap out Outdated HID Fixtures for Commercial-Grade LEDs. Select fixtures with robust surge protection (minimum 10kV/10kA) to handle utility line surges and lightning strikes.
- Step 5: Integrate Smart Photocells or Time Clocks. Install high-quality astronomical timers or ambient light sensors to ensure the lights turn on reliably before dusk, eliminating safety gaps during overcast afternoons.
Investing in professional lighting upgrades and ensuring your underground wiring is pristine isn’t just about aesthetics. It keeps your customers safe, keeps your insurance premiums low, and lets you sleep at night knowing your electrical system isn’t cooking itself under the pavement.