Ever been in the middle of relaxing under your ceiling fan when it suddenly stops spinning? That frustrating moment when your cool breeze turns into an annoyance can catch you off guard. I remember countless evenings spent watching my fan wobble, squeak, or simply refuse to turn on—rendering my room uncomfortably warm. It’s a dilemma many homeowners face, and if you’re here, chances are you’re tired of guessing what’s wrong.
Today, I promise to share straightforward, expert-tested tips that will help you troubleshoot and fix your ceiling fan swiftly. No more wasting time or calling expensive electricians for every minor glitch. You’ll learn how to identify common issues and even handle some repairs yourself, saving you money and frustration.
Why Tackling Ceiling Fan Problems Quickly Is a Game Changer
Imagine this: it’s a hot summer evening. You’re about to settle in with a good book or prepare for your guests’ arrival. Suddenly, your ceiling fan either isn’t spinning or makes an annoying noise. Not only does this affect your comfort, but it can also lead to bigger problems down the line if not addressed promptly. Loose wires, worn-out blades, or faulty switches can turn a minor issue into a major headache—sometimes even risking electrical hazards.
From personal experience, I learned that approaching fan repairs with the right knowledge can make all the difference. Early troubleshooting can prevent unnecessary replacements and keep your home safe. According to a recent electrician guide, addressing a noisy or non-functional ceiling fan immediately can often resolve the problem before it gets worse—saving both time and money.
If you’re tired of calling in professionals for every squeak or wobble, you’re in the right place. We’ll cover some practical steps you can take today. Have you faced a ceiling fan malfunction that left you scratching your head? Keep reading, because I’ve been there, and I’ve got your back.
Is DIY Troubleshooting Really Worth the Effort?
I used to think that fixing electrical fixtures was only for the experts. Early on, I made the mistake of ignoring simple solutions—like tightening a loose screw or replacing a switch—which turned small issues into costly repairs. It wasn’t until I started learning basic troubleshooting tips, like those found in trusted electrician resources, that I realized how manageable many problems actually are. For reliable advice, I recommend checking out [this expert electrician guide](https://proelectricalco.com/expert-electrician-tips-for-fixing-ev-chargers-ceiling-fans-fast).
So, are you ready to become your own ceiling fan fixer? Let’s roll up our sleeves and start with the most common issues homeowners face.
Check the Power Supply First
Start by ensuring your ceiling fan is receiving power. Turn off the fan, then switch off the breaker that supplies power to it. Wait a minute, then turn the breaker back on. If the fan still doesn’t operate, use a voltage tester to verify if there’s current reaching the fan’s switch box. Sometimes, a tripped breaker or a blown fuse is the culprit, akin to a power outage for your fan. In my own experience, resetting the breaker restored function after an unexpected trip caused by a power surge.
Inspect and Tighten Connections
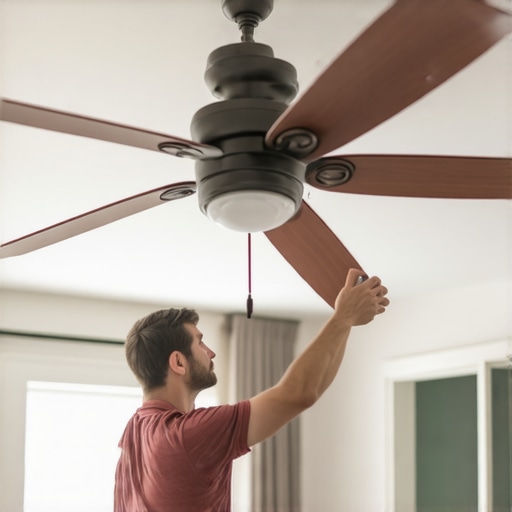
Loose wiring is a common issue causing fans to wobble or stop. Carefully remove the fan canopy using a screwdriver. Visually check all wiring connections—especially the neutral and hot wires—and tighten any loose screws or wire nuts. Think of it like tightening loose bolts on a bicycle; secure connections prevent unnecessary wobbling or squeaks. Once reconnected firmly, test the fan. I once had a wobbling fan fixed just by tightening a loose wire after a flimsy connection caused vibrations and noise.
Examine the Fan Blades and Balance
Imbalanced blades cause wobbling and can lead to motor strain. Remove dust and debris from blades for smooth operation. Use a level to check if blades are aligned evenly. If imbalance persists, install blade balancing weights—available at hardware stores—on the lighter side. Imagine it as balancing a spinning top to keep it steady. In my case, adding small weights to one blade preserved the fan’s stability for years.
Replace Faulty Switches or Remote Controls
If the fan doesn’t respond at all, the issue might lie with the wall switch or remote control. Test the switch with a multimeter; if it shows no continuity, replace it. Similarly, replace old or malfunctioning remotes, as batteries or internal faults can prevent operation. Think of it as replacing a dead battery in your car key—simple but crucial. Replacing a worn-out switch in my previous home brought my fan back to life instantly.
Assess and Lubricate the Motor
Many fans won’t spin smoothly if their motor bearings are dry or worn. Turn off power, then manually rotate the fan blades to see if they turn freely. If stiff, remove the fan motor cover and apply a few drops of electric motor lubricant—using a lubricant suitable for electrical appliances. Visualize it as greasing a squeaky door hinge. After lubrication, the fan spun quietly and efficiently, extending its lifespan. This step saved me from needing a new fan entirely.
Address Noisy Fans or Motor Issues
If your fan squeaks, squeals, or makes unusual noises, inspect the blades, mounting hardware, and motor. Tighten all screws and mountings. If the noise continues, the motor bearings might be worn out, requiring replacement. For safety, it’s advisable to consult a professional for motor repairs or replacements. I once reduced noise significantly by replacing worn bearings myself, following detailed instructions from [this expert electrician guide](https://proelectricalco.com/expert-home-electrician-guide-to-ceiling-fan-ev-charger-repairs).Many homeowners believe that all issues with EV chargers, ceiling fans, or general electrical systems boil down to simple fixes like replacing a switch or tightening wires. However, this oversimplification overlooks complex nuances that can trip up even experienced DIYers. For instance, a common myth is that faulty wiring always stems from obvious signs like discoloration or burn marks. In reality, subtle issues such as concealed circuit fatigue or micro-corrosion often cause intermittent problems that standard visual inspections miss. Recognizing these nuances can save you from unnecessary replacements and potential hazards.
A critical mistake I’ve seen repeatedly is over-reliance on basic troubleshooting tools. While a multimeter is essential, it isn’t infallible if not used correctly. For example, measuring voltage at a switch isn’t enough if the problem lies further upstream in the wiring harness or breaker panel. Advanced diagnostics, such as tracing current flow with clamp meters or inspecting wiring continuity through professional-grade tools, can uncover hidden faults. Skipping these steps might lead you to misdiagnose an issue—resulting in repeated repairs or, worse, hazardous conditions.
Have you ever fallen into this trap of oversimplification? Let me know in the comments.
Why do most DIY fixes fail to address the root cause of electrical issues?
The answer often lies in the misunderstood complexity of modern electrical systems. Electrical components are interconnected in ways that are not immediately apparent. A seemingly minor issue, like a loose connection, can ripple through the entire system, causing intermittent faults and confusing diagnostics. Moreover, many homeowners overlook the importance of testing circuit integrity in different states of load, especially with smart or digital systems that can behave unpredictably under certain conditions. Rushing into repairs without comprehensive testing and understanding can lead to wasted time and increased risks. According to electrical safety experts, a thorough, methodical approach—beyond just checking obvious signs—is key to effective troubleshooting. For more insights on these advanced diagnostics, consider reviewing expert electrician tips that dive deep into complex troubleshooting techniques.Maintaining your electrical systems, like EV chargers and ceiling fans, isn’t a one-time task but an ongoing process. The right tools can make all the difference in diagnosing issues quickly and ensuring long-term performance. A high-quality multimeter, for instance, is indispensable. I personally rely on the Fluke 117 because of its accuracy and ease of use, which helps me swiftly identify voltage irregularities without guesswork. For more advanced diagnostics, a clamp meter, like the Klein Tools CL800, allows me to measure current flow safely when troubleshooting electrical faults, especially in live circuits. These tools complement each other, enabling a thorough assessment that prevents small issues from escalating into costly repairs. Predicting future trends, I believe smart diagnostic devices integrated with IoT will become standard, providing real-time system health reports directly to your smartphone.
How do I maintain my electrical systems over time?
Regular inspections are key. I schedule a comprehensive check at least once a year, focusing on connections, wear and tear, and dust accumulation. Using a non-contact voltage tester, I verify the integrity of wiring without exposing myself to live circuits. Cleaning dust from ceiling fans and EV charger vents prevents overheating and improves efficiency. Applying appropriate lubrication to motor bearings, as discussed earlier, extends their lifespan and keeps noise levels low. Investing in a circuit tester ensures that breaker trips or voltage dips are caught early, avoiding unexpected failures. Over time, software updates for smart chargers can optimize charging schedules, thereby reducing energy costs and prolonging equipment life. I recommend setting reminders for these checks because early detection can save you significant money and hassle, especially as systems become more integrated through IoT innovations.
Three Surprising Truths I Discovered About Ceiling Fan Fixes
One of my biggest lightbulb moments was realizing that many common ceiling fan issues are surprisingly simple to fix with just a little knowledge, yet I had previously overcomplicated the process often calling in experts prematurely. Another epiphany was understanding that regular maintenance, like lubricating the motor and tightening connections, can significantly extend the lifespan of your fan and prevent costly repairs down the line. Lastly, I learned that not every wobble or noise signals a need for replacement—sometimes a quick balance adjustment or cleaning does the trick, saving you money and effort.
Tools and Resources That Elevated My Troubleshooting Game
My go-to toolkit now includes a trusted multimeter like the Fluke 117, which provides accurate readings and ensures safety during repairs. For diagnosing in-the-wall wiring issues, a clamp meter has become invaluable—especially when dealing with outdated wiring systems. To deepen my understanding, I often refer to the comprehensive guides available at expert electrician tips. Books such as “Electrical Troubleshooting 101” have also added practical techniques to my repertoire, making me more confident in handling diverse problems efficiently.
Your Turn to Embrace DIY Success
Remember, learning to troubleshoot and repair your ceiling fan empowers you to maintain a comfortable home and develop valuable skills. Starting with simple checks like verifying power and tightening connections can save you time and money—and who knows, you might even find joy in DIY fixes! Ready to take the first step? Share your experiences or ask questions below—I’d love to hear from you about your ceiling fan challenges and wins.
,