There was a time when I was ready to throw my hands up in frustration. My electric fan refused to spin, and my new EV charging station blinked endlessly without charging my car. That lightbulb moment hit me hard—I realized I was wasting precious time guessing what was wrong instead of knowing how to fix it quickly. If you’ve ever faced that sinking feeling of helplessness when appliances refuse to cooperate, you’re not alone. Many homeowners and small business owners grapple with these issues, often without knowing where to start.
Why Troubleshooting Skills Are More Crucial Than Ever
With the rise of electric vehicles and smart home devices, issues like a malfunctioning EV charger or ceiling fan can throw a wrench into your day. The good news? Most problems have manageable solutions—if you know how to approach them. Learning some straightforward troubleshooting techniques can save you time and money, and keep your home running smoothly. Plus, understanding these basics can help you avoid dangerous mistakes that could compromise your safety.
Ever Wondered If DIY Fixes Are Really Safe? Here’s the Truth
Early in my career, I made the mistake of thinking I could handle every electrical glitch myself. Sure, I read a few DIY articles and watched videos, but I overlooked one critical thing—power safety. One small misstep could have led to a serious shock or fire hazard. That’s why I always recommend consulting expert guides, like those found here. Knowing when to call a professional is just as important as knowing how to fix things yourself.
In the sections ahead, I’ll share proven tips and tricks to troubleshoot common issues with your EV charger and ceiling fan efficiently. Whether you’re a seasoned DIYer or just getting started, these insights will help you diagnose problems faster and keep your home safe and comfortable. So, if you’ve faced frustrating appliance failures lately, stay tuned—we’re about to turn those headaches into quick fixes.
.
Diagnose Before You Dive In
Start by gathering information about the problem. Is the charger not powering on, or is the fan making noise but not spinning? Think of it like a doctor taking your temperature before prescribing medicine. Check for any obvious issues like loose wires or tripped circuit breakers. This initial scan can save you time and prevent unnecessary risks. I once encountered a ceiling fan that wouldn’t start; after inspecting the switch for burnt contacts, I discovered a loose connection that was easily tightened—saving a costly repair.
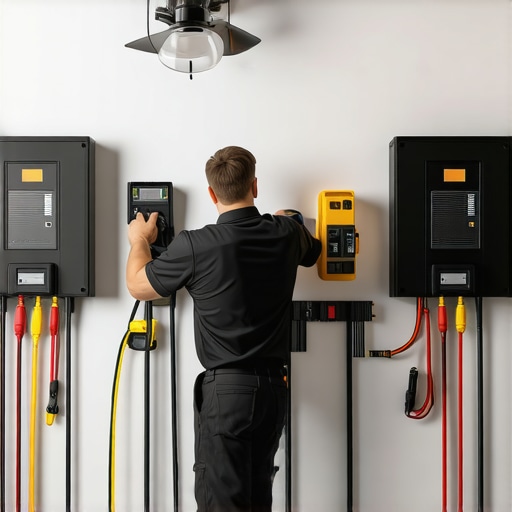
Use the Power of the Multimeter
Invest in a reliable multimeter—it’s like a doctor’s stethoscope for electronics. Turn off the power to your device and carefully test the voltage at different points. For instance, verify the supply voltage to the EV charger; if there’s no power, the issue lies elsewhere. When I tested my EV charger’s wiring, I found the outlet wasn’t supplying voltage due to a faulty circuit breaker, which was quick to fix and restored charging. Always follow safety guidelines and consider consulting detailed guides like here for advanced tips.
Check the Control Components
Controls are the brain behind the operation—like a remote control for your TV. For fans, inspect the switch, capacitor, and motor connections. For EV chargers, check the display panel, relays, and communication cables. A common issue I faced involved a capacitor that’s failed, causing the fan to hum but not turn. Replacing a bad capacitor took me less than 15 minutes, making a marked difference. Always ensure the power is off before touching these parts and consider referring to expert electrician tips.
Inspect Mechanical and Moving Parts
Sometimes, the problem isn’t electrical but mechanical. For ceiling fans, check if blades are warped or obstructed; for EV chargers, ensure cooling fans are free of dust and debris. I once cleaned out a fan’s blades covered in dust, which significantly improved airflow and noise levels. Use a soft brush or compressed air, but be cautious—damaging the blades or motor can lead to bigger issues. Proper lubrication and alignment, when needed, can prevent future failures. Think of it like maintaining a car engine—regular checkups prolong the lifespan.
Test and Replace Faulty Components
Once identified, faulty parts should be replaced promptly. Keep spare parts like capacitors, relays, or wiring kits handy if you’re comfortable with DIY. When my EV charger displayed error codes, replacing the communication cable solved the problem immediately. For complex issues, it’s safer to consult a professional; however, knowing how to test components using your multimeter is invaluable. You can find detailed repair guides at here.
Verify and Secure Connections
Loose or corroded connections are common culprits. Disconnect power before inspecting terminal screws and connectors. Tighten any loose terminals, and apply dielectric grease to prevent corrosion—it’s like applying lotion to protect your skin. I had an issue with a ceiling fan that was intermittently working; after tightening the wires and cleaning corrosion, it ran flawlessly. Always double-check your work, and if unsure, seek expert advice from trusted technicians at this resource.
Test Under Power and Confirm Fixes
After repairs, restore power and test your device’s functionality. Observe for proper operation, unusual noises, or error messages. Document any residual issues. For example, after replacing a faulty relay in my EV charger, I ran multiple test charges, confirming the problem was resolved. If problems persist, retrace your steps or consult a professional. Remember, methodical testing ensures safety and reliability—think of it as giving your device a thorough check-up after repairs.
Maintain Your Devices Regularly
Prevention is better than cure. Schedule routine inspections and cleaning, just like preventive health care. Check wiring for signs of wear, ensure connections are tight, and keep components clean. A little proactive care can prevent most troubleshooting headaches. Recognize early warning signs such as flickering lights or unusual sounds, and address them promptly. This habit can save you significant time, money, and safety risks, turning troubleshooting from a dreaded chore into a manageable routine. For ongoing tips, explore this guide.
Many homeowners believe that troubleshooting electric appliances like EV chargers and ceiling fans is straightforward, but in reality, there’s a lot more nuance than most realize. A common myth is that replacing a faulty component always fixes the problem—however, this approach can overlook underlying issues such as wiring misconfigurations or grounding errors, which persist even after component replacement. Relying solely on part swaps without a comprehensive diagnosis often leads to repeated failures and safety hazards. Additionally, some assume that if an appliance is slightly slow or noisy, it’s an isolated issue—yet, these symptoms might indicate deeper electrical problems affecting your entire system, which requires an electrician’s expert assessment.
Why Do So Many Troubleshooting Tricks Fail for Advanced Users?
One trap many fall into is undervaluing the importance of properly diagnosing electrical circuits before jumping into repairs. For example, testing voltage at points without verifying proper grounding can give false readings, leading you astray and potentially causing electrical shocks or damage. Studies, like those compiled by the Electrical Safety Foundation International, show that improper troubleshooting is a top cause of homeowner electrical accidents. This emphasizes the need for advanced techniques, such as using a multimeter to check for potential voltage leaks or transient faults that aren’t immediately visible. Knowing these nuances can prevent costly mistakes and improve safety.
Another common mistake involves neglecting the role of electrical codes and standards during troubleshooting. Many assume that their existing setup passes inspection simply because there are no visible issues. However, outdated wiring or non-compliant installations can create invisible hazards, especially as appliances like EV chargers draw high currents. Ensuring your system complies with current electrical codes and employing proper testing protocols—like inspecting circuit breakers and load capacities—are critical for both safety and performance. For those ready to go deeper, resources like this guide can provide valuable insights.
Have you ever fallen into this trap? Let me know in the comments and share your experiences. Remember, advanced troubleshooting isn’t just about fixing the problem—it’s about understanding the intricate details that keep your home safe and efficient.
Keeping It Working: Tools I Recommend for Troubleshooting and Maintenance
To ensure your electrical appliances like EV chargers and ceiling fans operate smoothly over time, investing in high-quality, reliable tools is essential. My go-to instrument is a digital multimeter. Unlike analog models, a good digital multimeter provides precise voltage, current, and resistance readings, which are invaluable when diagnosing complex issues. Personally, I rely on the Fluke 117 because of its accuracy and durability, especially when checking supply voltages or testing continuity in wiring. Using this device regularly helps spot potential problems before they become costly repairs, aligning with expert advice found here.
Another tool I highly recommend is a insulated screwdriver set. Proper insulation prevents shock hazards when working in live environments—an absolute must for safe troubleshooting. I prefer the Wiha insulated screwdrivers because they meet the highest safety standards and grip well, allowing for precise removal and tightening of terminal screws without risking damage or injury. Between these, a digital multimeter and quality insulated screwdrivers form the backbone of my maintenance kit, enabling quick and safe diagnosis of electrical issues at home or on the job.
In addition to hardware, software tools like electrical testing apps can streamline troubleshooting. I utilize the SmartSwitch app paired with compatible smart circuit breakers to monitor real-time electrical loads, helping identify overloads or irregular power fluctuations that may harm your devices. These insights complement manual testing, offering a comprehensive approach to long-term maintenance and early problem detection.
Predicting where this trend is headed, I believe we’ll see an increased integration of smart diagnostics and AI-driven monitoring systems, providing proactive alerts before appliances fail. This evolution will transform regular maintenance from reactive repairs into predictive care, saving time and money in the long run.
How do I keep my electrical systems in top shape over time?
Routine inspections are key. Schedule quarterly checks of wiring connections, circuit breaker performance, and device operation. Use your multimeter to verify consistent voltage across outlets and at the appliance terminals—any fluctuation could be a warning sign. Clean and lubricate mechanical parts, such as fan bearings and relay contacts, to prevent wear. Keep a log of maintenance activities to identify patterns and plan repairs proactively. Remember, investing in quality tools like those I’ve mentioned not only makes troubleshooting safer but also more effective, minimizing downtime and unexpected failures. For detailed tips on preventative maintenance, explore this resource.
Looking ahead, continuous advancements in diagnostic tools promise even smarter maintenance options. Imagine sensors embedded in your appliances that detect issues remotely and inform your smartphone—reducing the guesswork and making troubleshooting faster. As an enthusiast, I encourage you to try the advanced tip of regular multimeter checks during your routine maintenance, as this simple step can prevent many headaches down the line.
What Nobody Tells You About Fixing Electrical Glitches
One of my biggest lightbulb moments was realizing that most troubleshooting success boils down to patience and thorough diagnosis, rather than jumping straight to parts replacement. I once replaced a relay in my EV charger only to find the issue persisted. It wasn’t until I revisited my wiring and checked the circuit breaker that I discovered a loose connection. This taught me to approach problems systematically, embracing a mindset that values detailed inspection over quick fixes.
My Top Tools That Changed How I Approach Repairs
Investing in a quality digital multimeter truly transformed my troubleshooting efficiency. Pairing this with a set of insulated screwdrivers kept me safe and precise. These tools aren’t just gadgets—they’re your ticket to confidently identifying problems and understanding your appliances better, helping you prevent future issues before they escalate.
Don’t Wait for a Crisis to Start Maintenance
Regular check-ins and cleaning are underrated yet powerful strategies. I schedule quarterly inspections, during which I test voltage, tighten connections, and clear dust from cooling fans. Doing so has prevented many emergencies, saving me money and worry. Think of maintenance as your home’s health check—it keeps everything running smoothly and extends the lifespan of your appliances.
Insider Wisdom That Changed My Troubleshooting Game
- Avoid the Part Swap Trap: Replacing components blindly can mask underlying wiring or grounding issues. Diagnose thoroughly first.
- Respect Safety Protocols: Always disconnect power before opening devices. Using proper tools and protective gear isn’t optional—it’s essential.
- Think Beyond the Obvious: Strange noises or minor quirks often hint at deeper problems. Listening and observing can reveal clues electric meters might miss.
- Consult Reliable Resources: Trusted guides and expert advice, like those found here, save time and prevent costly mistakes.
- Patience Is Key: Rushing through repairs increases the risk of errors. Sometimes, stepping back and reviewing your work ensures safety and correctness.
Harnessing Knowledge for Safer, Smarter Home Repairs
Troubleshooting electrical issues in your home—especially delicate ones like EV chargers and ceiling fans—can be rewarding when approached with curiosity and care. Remember, every problem solved adds to your confidence and capacity to maintain a safe environment. Whether you’re a seasoned DIYer or just starting out, embracing these lessons will empower you to handle future challenges more effectively. Keep learning, stay patient, and never hesitate to seek expert help when needed—the safety and comfort of your home depend on it.