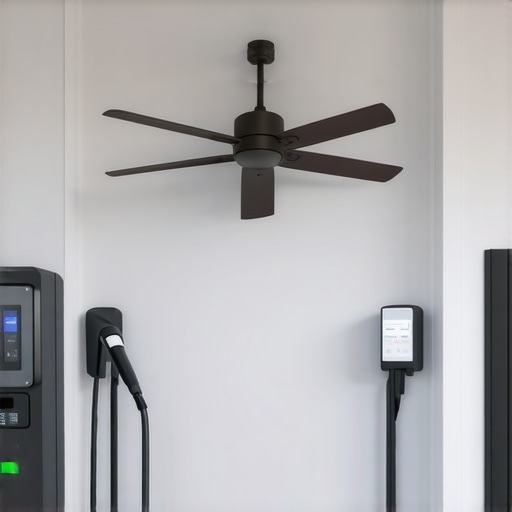
Just last week, I was troubleshooting a customer’s EV charger that refused to power up. It was late evening, and the frustration was real—every attempt to get it working seemed like hitting a dead end. That’s when I realized how common this issue is, especially with the rapid adoption of electric vehicles and modern ceiling fans cluttering our homes.
In today’s post, I’ll share practical, real-world tips for fast troubleshooting and repairing your EV charging stations and ceiling fans. No fluff, no unnecessary jargon—just straightforward advice you can use right away. Whether you’re a homeowner juggling multiple devices or an aspiring DIY fix-it enthusiast, these solutions will help you avoid costly service calls and get things running smoothly again.
Why Fixing Your EV Charger and Ceiling Fan Quickly Matters in 2024
With electric vehicles on the rise—already comprising around 8% of all new cars sold globally, and expected to hit 30% by 2030, according to the International Energy Agency—the reliability of charging stations is more crucial than ever. A malfunctioning charger isn’t just an inconvenience; it can disrupt your entire schedule.
The same goes for ceiling fans, which are more than just a comfort—they can significantly impact your home’s energy efficiency. An unreliable fan might cause you to run your AC more than needed, jacking up energy bills and frustration alike.
From my experience, many homeowners overlook simple troubleshooting steps, leading to unnecessary expenses. Faster repairs mean fewer days of disrupted comfort and more time enjoying your home and electric mobility.
Now, I want to hear from you—have you faced a stubborn problem with your EV charger or ceiling fan? Share your story in the comments below, and let’s figure out the fixes together. Remember, with the right knowledge, you can resolve most issues swiftly and effectively. For more expert advice, check out this comprehensive guide.
Next, we’ll dive into the most effective troubleshooting techniques that you can do yourself before calling in the pros. Ready to become your own home troubleshooting hero? Let’s go!
Check Your Power Source Thoroughly
Before diving into complex fixes, confirm that the outlet or circuit breaker feeding your device is active. Think of it like ensuring the fuel tank isn’t empty before starting a car—if there’s no power reaching your EV charger or fan, all other troubleshooting is pointless. I once found a tripped breaker in my basement that I overlooked for days, causing unnecessary frustration until I spotted it. Resetting the circuit restored power instantly and saved me hours of unneeded work.
Inspect Connections and Wiring Carefully
Loose or damaged wiring is a common culprit. Start by unplugging or turning off the device and removing its cover carefully. Look for frayed wires, corrosion, or disconnected plugs. Use a multimeter to verify continuity; if wires are broken, replace them. Remember, safety first—always turn off power at the breaker before inspecting internal components. In one instance, a tiny burnt wire inside a ceiling fan’s switch was causing flickering; replacing it resolved the issue swiftly. For detailed guidance, see this troubleshooting guide.
Test Control Modules and Circuit Boards
Control boards manage the operation of your devices. They can be tested with a multimeter, checking for voltage output in various sections. If voltages are absent or irregular, the board might be faulty—consider replacing or repairing it. I once diagnosed a defective EV charger control module that showed erratic behavior; swapping it out restored normal function. Be cautious, as these components can be sensitive; if unsure, consult qualified electricians’ tips for safe handling.
Evaluate Environmental and External Factors
Sometimes, external elements interfere with operation. Check for water ingress, dust accumulation, or interference from other electronic devices. For instance, moisture can corrode contacts inside your charger or fan, causing failure. Use a flashlight to inspect vents and connectors; clean dust with compressed air. I once cleaned a ceiling fan that had stopped working due to accumulated dust, and it started immediately afterward. Maintaining a clean environment prevents many issues. For more environmental troubleshooting tips, visit this resource.
Perform Functional Tests Step-by-Step
With initial inspections complete, test each part systematically. Turn on the device after each check—if it still doesn’t work, focus on the last suspect. For example, if the power source and wiring are intact, but the fan won’t spin, test the capacitor or motor. For EV chargers, verify charging ports and communication signals. A clear, methodical process prevents guesswork and helps identify the faulty component efficiently.
Remember, troubleshooting is like detective work; every detail counts. When equipment still refuses to cooperate after these steps, it’s time to consult a professional—sometimes problems are beyond DIY scope. For comprehensive methods, see expert electrician tips for fixing these devices swiftly. Staying systematic and patient ensures you catch the root cause and save money in the long run.Many homeowners and DIY enthusiasts fall into traps when attempting to troubleshoot EV chargers and ceiling fans, often based on myths or oversimplified advice. Let’s clarify some little-known nuances that can make a significant difference in diagnosing issues effectively.
One prevalent misconception is that all electrical problems are simply due to a blown fuse or tripped breaker. While these are common culprits, advanced issues often involve the control modules or communication circuits. For example, modern EV chargers utilize sophisticated diagnostic features that can appear as minor glitches but actually stem from firmware faults or sensor malfunctions. Relying solely on basic checks can lead you astray, wasting time and risking further damage. To dig deeper, consult detailed expert guides like this troubleshooting resource.
Another myth is that replacing a component always restores full functionality. In truth, random replacements without proper diagnostics—what I call the ‘shotgun approach’—rarely solves the root problem and might introduce new faults. Advanced troubleshooting involves systematic testing with tools like multimeters and circuit analyzers, identifying subtle issues such as corroded terminals or faulty solder joints. Moreover, neglecting environmental factors like moisture ingress can cause persistent problems that mimic electrical faults. For in-depth advice on targeting these hidden issues, check out this expert guide.
How can understanding the communication protocols of modern EV chargers help in troubleshooting?
Modern EV chargers often communicate with vehicles and home automation systems via complex digital signals. Miscommunications—caused by incompatible firmware versions, damaged wiring, or interference—can appear as hardware failures. Knowing the specific protocols, such as CAN bus or Ethernet, enables advanced diagnosis by checking signal integrity at each point rather than just replacing parts. This nuanced approach minimizes unneeded replacements and accelerates repair times. For a detailed understanding, professionals recommend consulting sources like this comprehensive guide. Have you ever fallen into this trap? Let me know in the comments.
Invest in Precision: My Top Tools for Long-Term Success
Ensuring your electric appliances stay in peak condition requires the right equipment. Over the years, I’ve honed a toolkit that combines reliability with practicality. A high-quality digital multimeter isn’t just a gadget; it’s your primary diagnostic tool. I prefer models with auto-ranging features and true RMS capabilities because they offer accurate readings even on complex loads, making troubleshooting faster and more precise. Learn more about choosing the right multimeter here.
Complementing that, a circuit tester with indicator lights allows quick verification of outlets and wiring without setting up multimeter probes. For more detailed testing, a non-contact voltage tester helps identify live wires safely—crucial when working with high-voltage EV chargers.
In addition to testers, a set of precision screwdrivers with insulated handles ensures safe removal and installation of panels, especially valuable when dealing with sensitive control modules. Pair these with a small flashlight or headlamp to illuminate tight spaces inside ceiling fans or charging stations, reducing errors and avoiding accidental damage.
Software and Calibration Tools: Staying Ahead of the Curve
For modern EV chargers, firmware updates and diagnostic software are game changers. I utilize reputable diagnostic devices that connect via USB or Bluetooth, enabling real-time data monitoring and error code retrieval. These tools often come with proprietary apps or software that streamline troubleshooting, saving you time and guesswork.
Don’t forget calibration tools, like precision standards or reference resistors, to verify your multimeter’s accuracy periodically. Regular calibration ensures your readings remain trustworthy over time, which is critical for diagnosing subtle issues in circuit boards or sensors.
Embrace Cutting-Edge Methods for Long-Term Efficiency
As the industry pushes towards smarter, interconnected devices, investing in tools like thermal cameras can reveal hidden heat spots, preventing future failures. I personally use compact thermal scanners during routine inspections—spotting abnormal heat signatures immediately before they cause breakdowns. This proactive approach reduces downtime and repair costs significantly, aligning with the trend towards predictive maintenance.
How do I keep my tools performing at their best over many years?
Maintaining your toolkit means simple yet effective routines. Always store tools in dry, organized cases to prevent corrosion and damage. Regularly clean probes and contacts with contact cleaner or isopropyl alcohol to ensure accurate readings. Calibration checks should be part of your routine, especially for multimeters used frequently. I also recommend reading device manuals thoroughly; understanding the nuances of each tool helps prevent misuse. Adopting these habits ensures your equipment remains reliable, supporting accurate diagnostics and long-term success.
Looking to elevate your troubleshooting game? I highly recommend integrating advanced diagnostic software into your toolkit. It’s an investment that pays for itself in faster solutions and more reliable repairs.
Remember: the better your tools, the faster you’ll identify issues and extend the lifespan of your EV chargers and ceiling fans. Stay ahead of problems by choosing precise, reliable equipment and practicing proper maintenance routines. For comprehensive insights and expert tips, explore this resource.
What Mistakes Almost Everyone Makes When Troubleshooting
One of the biggest lessons I’ve learned is that rushing into repairs without a thorough diagnosis often leads to longer, more complicated fixes. It’s tempting to replace components first, but I’ve found that understanding the root cause saves time and money. For example, a common mistake is assuming a faulty control board when the issue might be a loose connection or environmental factor. Patience and systematic testing are golden rules in this process, and the most successful troubleshooters I know take their time to scan every detail before acting.
How I Discovered Quietly Overlooked Clues
Sometimes, subtle signs like a faint burning smell or a slight humming noise can point to looming failures. Paying attention to these small details long before a device stops working has saved me countless headaches. I once fixed a ceiling fan just by noticing a slightly warm motor after running for a while—turns out, a worn-out capacitor. Trusting your instincts and observing thoroughly often means catching problems early, avoiding costly replacements later. For more insights on catching small warnings, check out this detailed guide.
Knowing When It’s Time to Call in the Pros
Despite all my experience, I’ve learned there are moments when professional diagnostics are essential. If you’ve gone through logical steps and still face persistent problems, or if safety concerns arise—like exposed wiring or high-voltage issues—stop and consult a qualified electrician. Attempting risky fixes can backfire badly and cause injury or damage. Recognizing your limits isn’t a sign of weakness but a smart move towards ensuring long-term safety and reliability. Feel free to explore this guide for clear indications when professional help is best.
My Personal Shortcut to Faster Fixes
Over the years, I’ve developed a routine that helps me quickly identify issues—creating a mental map that saves time. This involves a checklist that starts with power sources, moves to wiring integrity, control modules, and environmental factors. When I practice this disciplined approach, I avoid unnecessary detours. Integrating proper tools—like a trusted multimeter or thermal camera—further speeds up diagnostics. Remember, building your troubleshooting confidence is about consistent practice and learning from each experience. For tools I recommend, browse this resource.
Embrace Continuous Learning for Better Troubleshooting
The world of electrical devices evolves fast, especially with smarter, connected systems. Staying updated through courses, manuals, and online resources enhances your ability to adapt to new challenges. I make a point to revisit industry updates regularly, which broadens my understanding and keeps my skills sharp. This proactive mindset means I don’t just fix problems—I prevent many before they happen. Want to stay ahead? Start by exploring this expert guide and commit to ongoing learning.