The Invisible Safety Net: Why Your House is Only as Safe as the Dirt Beneath It
You can spend five figures on a level 2 EV charger, gold-plated patio cover outlets, and fancy driveway sensor lights, but if your grounding system is a single, corroded rod from 1974, you’re building a mansion on a swamp. Most homeowners think electricity just ‘disappears’ when they turn off a switch. It doesn’t. It’s a pressurized force looking for any path back to the source. When that path isn’t a clean copper wire, it finds your skin, your expensive appliances, or the framing of your house.
My journeyman used to smack my hand if I stripped a wire with a knife instead of the right pair of dikes. ‘You nick the copper, you create a hot spot,’ he’d scream. He was right, but he was even more psychotic about grounding. He once made me dig up a 10-foot trench by hand because I didn’t have the 6-foot separation required between rods. ‘Electricity doesn’t care about your sore back, kid,’ he said. ‘It cares about resistance.’ That lesson stuck. When I do electrical safety audits today, the first thing I do is pull out the infrared thermography scans. You’d be amazed how many main lugs are screaming at 200 degrees because the ground path is so choked with high resistance that the system is literally vibrating with heat.
“Where the grounding electrode consists of a single rod, pipe, or plate, it shall be supplemented by an additional electrode of a type specified in 250.52(A)(2) through (A)(8).” – National Electrical Code (NEC) 250.53(A)(2)
If you only have one ground rod, you are likely out of code and definitely out of luck during a surge. Adding a secondary grounding electrode—usually a second 8-foot copper-clad steel rod—is the cheapest insurance you’ll ever buy. It’s the difference between a lightning strike blowing a fuse or melting your transformer installation and frying every circuit board in the house.
The Physics of the ‘Cold Creep’ and Soil Resistivity
Why do we need two? It comes down to Ohm’s Law and the physical reality of soil. Soil isn’t a constant. In a drought, the earth shrinks away from the rod, creating an air gap. In a flood, the ions are so dispersed that the resistance spikes. This is where we talk about ionic conductivity. A single rod might give you 25 ohms of resistance on a good day, but the NEC wants you to have a redundant path because rods fail. They corrode. The ‘Monkey Shit’ (duct seal) you put around the entrance dries out, water seeps in, and the rough-in connection at the service mast begins to oxidize.
When you have a 24 hour emergency electrician call-out for ‘ghost lights’ or flickering, 90% of the time it’s a loose neutral or a failed ground. Without a solid secondary electrode, that excess voltage has nowhere to go. It sits on the metal chassis of your toaster or your level 2 EV charger. If you touch it while standing on a damp garage floor, you become the grounding electrode. The secondary rod ensures that even if one connection fails due to thermal expansion—what we call ‘Cold Creep’ in aluminum or copper-clad systems—the fault current has a secondary ‘Home Run’ back to the earth.
Step-by-Step: Driving the Secondary Rod
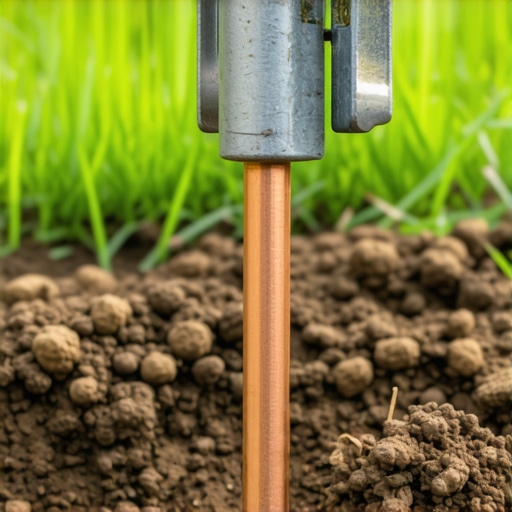
First, you need to locate your existing rod. It’s usually near the meter can. If you can’t find it, you need free electrical estimates from a pro because it might be buried under a concrete slab or completely rotted away. Once found, you’re going to measure out at least 6 feet. Why 6 feet? Because the ‘sphere of influence’ of the electrons dissipating into the soil overlaps if they are too close. You want fresh, undisturbed dirt.
- The Drive: Use a post-driver or a rotary hammer with a ground rod bit. Driving an 8-foot rod with a sledgehammer is a ‘Widow Maker’ task for your lower back. Drive it until only 4 inches are above grade.
- The Wire: Use #6 AWG bare copper wire. This is the standard for most residential services. Don’t use Romex or some leftover scrap. It needs to be a continuous run from the first rod to the second, and ideally, all the way back to the panel tub.
- The Acorn Clamp: Use a direct-burial rated ‘acorn’ clamp. Torque it down until you feel the copper deform slightly. If it’s loose, it’s useless. Use your Tick Tracer to ensure no stray voltage is present before you grab the clamp.
- Bonding: If you have temporary power services active, be extremely careful. You are connecting the house’s safety system to the planet.
“A grounding system provides a path for fault current and helps stabilize voltage during surges, reducing the risk of fire and shock.” – NFPA 70E Standard for Electrical Safety
The Infrared Reality Check
Once the secondary rod is in, it’s a good time to look at the rest of the system. I often find that people install these rods but forget to check their GFCI outlet installation in the kitchen or their patio cover outlets. A ground rod doesn’t replace a GFCI; they work together. The rod handles high-voltage surges and lightning; the GFCI handles the 5-milliamp leak that stops your heart. If I run an infrared thermography scan on a panel after installing a secondary ground, I expect to see the neutral bar temp drop. If it doesn’t, we have a deeper issue with the utility transformer or a bootleg ground somewhere in the trim-out phase of a previous renovation.
Conclusion: Don’t Skimp on the Copper
Electricity is a lazy, angry beast. It wants to go home, and it will take the easiest path to get there. By installing a secondary grounding electrode, you are giving it a wide, multi-lane highway into the dirt instead of a narrow, congested side street through your electronics. Whether you’re worried about your driveway sensor lights surviving a summer storm or ensuring your new level 2 EV charger doesn’t melt your service panel, the ground rod is the foundation. Don’t trust a single rod. Drive the second one, torque the clamps, and sleep better knowing your house isn’t the primary path for a lightning bolt.