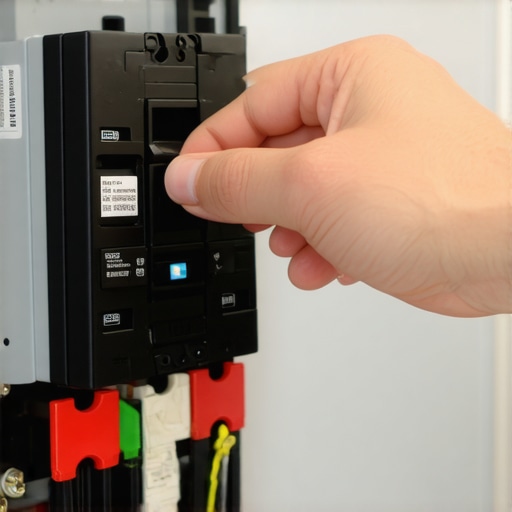
The Hidden Clock in Your Walls
If you think sizing a circuit breaker is as simple as reading the number stamped on the plastic handle of the old one, you are exactly the reason I carry a heavy insurance policy and a thermal imaging camera. Your electrical panel isn’t just a box of switches; it is a thermal management system. Over thirty-five years in this trade, I have seen the same story play out: a homeowner replaces a ‘nuisance’ tripping breaker with a larger one, and three months later, I am looking at a charred mess where a family used to eat dinner. We are going to break down the cold, hard physics of circuit protection, because electricity doesn’t care about your convenience; it only cares about resistance and the path to ground.
“Aluminum wire connections can overheat and cause a fire without tripping the circuit breaker.” – CPSC Safety Alert 516
My old journeyman used to smack my hand with a pair of dikes if I ever stripped a wire with a pocketknife. ‘You nick the copper, you create a hot spot,’ he’d scream. He was right. That tiny nick reduces the cross-sectional area of the conductor, increasing resistance. Resistance generates heat. Heat causes the wire to expand and contract, eventually loosening the terminal screw. This is the ‘Time Bomb’ in mid-century homes, especially those built between 1960 and 1980. These houses are often plagued by Aluminum wiring and Federal Pacific Electric (FPE) panels. If you have an FPE ‘Stab-Lok’ panel, stop reading this and call a pro for a full code violation correction. Those breakers are notorious for ‘jamming’—they won’t trip even when the wire is literally melting off the bus bar. I have seen drone thermography scans of these panels where the breakers were glowing like Christmas lights while the homeowners thought everything was fine.
The Physics of the Trip: Thermal vs. Magnetic
To size a breaker, you have to understand the ‘Trip Curve.’ A standard thermal-magnetic breaker has two jobs. The first is the thermal trip. Inside the breaker, there is a bi-metallic strip. As current flows, it heats up. If the current exceeds the breaker’s rating, the two metals expand at different rates, causing the strip to bend and mechanically trip the internal spring. This is why a 15-amp breaker doesn’t trip the microsecond you hit 15.1 amps; it takes time for the heat to build. This is critical for workshop electrical setup where motors (like a table saw) have a high ‘inrush’ current. The second job is the magnetic trip. This is for dead shorts. A massive surge of current creates a magnetic field that pulls a solenoid, tripping the breaker instantly. When you are sizing a replacement, you are matching the breaker to the Home Run (the wire running back to the panel), not the appliance.
Component Zooming: The Cold Creep Factor
In mid-century homes, we deal with the ‘Cold Creep’ phenomenon in aluminum conductors. Aluminum is softer than copper and has a much higher coefficient of thermal expansion. Every time you turn on a heavy load, like pool pump electrical or a whole house fan wiring system, the wire heats up and expands. Because it’s trapped under a steel terminal screw, it has nowhere to go, so it crushes itself. When it cools down, it contracts, but it doesn’t return to its original shape. It leaves a microscopic gap. That gap becomes a high-resistance bridge where arcing occurs. If you size a breaker too large for an old aluminum circuit, you are effectively turning your walls into a toaster oven. When I do a forensic inspector walk-through, I’m looking for that tell-tale fishy smell—the scent of burning phenolic resin from the breaker casing.
“The overcurrent protective device shall be sized to protect the conductor ampacity.” – NEC 240.4
When you are looking at GFCI outlet installation or outlet switch repair, you must verify the wire gauge. If you see 14 AWG wire (roughly the thickness of a nickel), you are limited to a 15-amp breaker. If you have 12 AWG (thickness of a small paperclip), you can move up to 20 amps. Do not guess. Use a wire gauge tool. If you put a 20-amp breaker on 14-gauge wire because the 15-amp one kept tripping when the vacuum ran, you have bypassed the safety threshold of the wire. The wire will become the fuse, melting its insulation long before the breaker ever ‘feels’ the heat. This is especially dangerous in underground wiring services where moisture can hide the early signs of insulation failure until the ground itself becomes energized.
The Load Calculation: Why More Isn’t Better
Modern homes with demand response systems and heavy electronics require precision. If you are doing a grounding electrode install to stabilize your panel’s reference to earth, you still have to respect the 80% rule. A breaker should only handle a continuous load (anything running for 3 hours or more) equal to 80% of its rating. A 20-amp breaker is really a 16-amp breaker for things like space heaters or EV chargers. I’ve seen DIYers ‘double-tap’ a breaker—shoving two wires into one lug—to add a circuit for a new workshop. This is a primary cause of bus bar pitting. When you have a loose or improper connection, the electricity ‘jumps’ the gap, creating carbon tracks. Carbon is conductive, but highly resistive. It creates a permanent path for heat to build until the panel faceplate is too hot to touch. Always use your Tick Tracer or, better yet, a Wiggy (solenoid voltmeter) to verify there isn’t a phantom voltage or a loose neutral before you ever seat a new breaker into the bus. If the bus bar is discolored or shows signs of silvering/pitting, the panel is compromised. A new breaker won’t fix a rotted bus.
{“@context”:”https://schema.org”,”@type”:”HowTo”,”name”:”How to size a replacement circuit breaker”,”step”:[{“@type”:”HowToStep”,”text”:”Identify the wire gauge of the circuit using a wire gauge tool.”},{“@type”:”HowToStep”,”text”:”Check the panel schedule and the manufacturer label for compatible breaker types.”},{“@type”:”HowToStep”,”text”:”Calculate the total continuous load and ensure it does not exceed 80% of the breaker’s rated capacity.”},{“@type”:”HowToStep”,”text”:”Inspect the bus bar for signs of corrosion, pitting, or carbon tracking before installation.”}]}