The Smell of Carbon and the Silence of a Dead Home
You never forget the smell. It is a nauseating cocktail of burnt plastic, scorched drywall, and the metallic tang of vaporized copper. When I walk into a structure after a fire, I am not looking at the soot-stained walls; I am looking for the silent killers hidden behind them. I remember a rough-in back in ’88. My lead saw me using a pair of dikes to score insulation on a #12 solid copper. He smacked my hand so hard I thought I’d lost a finger. ‘You nick that conductor, you’ve just built a fuse that won’t blow,’ he growled. Decades later, looking at fire-damaged remains, those nicks are often where the beads of melted copper start. By 2026, insurance claims for fire damage are going to be more scrutinized than ever, and if your restoration does not involve a forensic-level electrical overhaul, you are just waiting for the next spark.
Step 1: The Forensic Deconstruction and Lockout Tagout Protocol
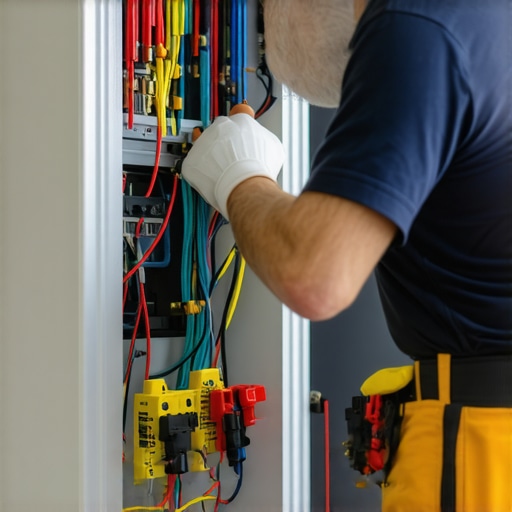
Before any restoration begins, we have to ensure the site is not a death trap. This starts with lockout tagout training protocols for every contractor on site. When a fire ravages a home, the electrical system’s integrity is zero. We do not just flip a breaker; we isolate the entire service. This is where electrical safety audits begin. I have seen guys walk into a flooded basement after a fire and reach for a panel that was still energized by a neighbor’s illegal bridge. It is suicidal. We perform a total disconnect, often requiring meter socket replacement if the heat was intense enough to warp the jaw tension. If those lugs lose their spring tension, you get a high-resistance connection that will melt a new meter in months. We start by stripping the system back to its skeleton to see what survived the heat and what turned into a brittle mess.
“Exposed wiring that has been subjected to fire or excessive heat may have experienced damage to its insulation, making it unsafe for further use.” – NFPA 70: National Electrical Code (NEC) Handbook
Step 2: Component Zooming—The Physics of Thermal Degradation
Most people think if the light still turns on, the wire is fine. They are wrong. Heat changes the molecular structure of copper. When copper is exposed to temperatures above 400 degrees Fahrenheit, it undergoes a process called annealing. It becomes soft, its resistance changes, and its current-carrying capacity is compromised. In mid-century homes built between 1960 and 1980, we deal with the nightmare of aluminum wiring. Aluminum already suffers from ‘Cold Creep’—the tendency of the metal to expand and contract at a different rate than the steel screws holding it in place. Fire heat accelerates this a thousand-fold. The screws loosen, oxygen hits the aluminum, an oxide layer forms, and resistance skyrockets. This is why thermal imaging inspections are mandatory. We use infrared to find the ‘hot spots’ that the naked eye misses. If I see a purple-to-white gradient on a home run, that circuit is getting ripped out. No questions asked.
Step 3: The Soot Problem and Smoke Detector Installation
Soot is not just dirt; it is a conductive carbon film. If soot gets inside a bathroom exhaust fan motor or settles across the terminals of a duplex receptacle, it can create a ‘carbon track.’ This is a path for electricity to crawl across an insulator, eventually leading to a sustained arc. As part of any 2026 claim restoration, we perform a deep-clean and replacement of all devices. We do not just wipe them down. We replace. This includes a comprehensive smoke detector installation using interconnected, hard-wired units with battery backups. Modern codes are unforgiving here. If you are opening the walls, you are bringing the whole house up to current standards. We also look at the network cable installation. People forget that Cat6 and fiber optics have low melting points; even if they look okay, the data attenuation after a fire makes them useless.
“Smoke and soot contain conductive materials that can create a path for electricity, leading to arcing and potential reignition of fires even after the primary fire is extinguished.” – CPSC Safety Bulletin #112
Step 4: Managing the Infrastructure—From Service Masts to Up Lighting
When the fire department hacks a hole in your roof, they aren’t worried about your up lighting services. They are worried about the fire. Consequently, the exterior electrical service is often mangled. We look for meter socket replacement needs immediately. Water from the fire hoses often runs down the service mast and settles in the bottom of the enclosure, leading to galvanic corrosion. If you have a copper lug on an aluminum bus, the salt and water create a battery that eats the metal. For commercial properties, this extends to sign lighting installation. If the exterior signs were energized during the fire, the surge often fries the transformers. We provide free electrical estimates that break down these hidden costs because insurance adjusters love to overlook the ‘non-visible’ damage.
Step 5: Load Calculation and The Final Megger Test
The last step isn’t just turning the power back on; it’s proving the system can handle it. We perform a ‘Megger’ test—an insulation resistance test that pumps 500 to 1,000 volts through the wires to see if any leakage occurs. It’s like a pressure test for your plumbing. If the insulation is cracked or charred, the Megger will catch it. We also re-evaluate the total load. If the homeowner is adding an EV charger or a high-end kitchen during the rebuild, the old 100-amp service won’t cut it. This is the time for a heavy-up. We don’t do ‘handyman specials.’ We torque every lug to the manufacturer’s inch-pound specifications using a calibrated torque wrench. When I sign off on a fire restoration, I want to know that I could sleep in that house myself without one eye open. Electricity is a faithful servant but a vengeful master. Treat it with the respect it deserves, or it will take your house again.